Summarize in:
Shopify is one of the most powerful platforms for starting an online store, but that doesn’t mean success is automatic. Anyone can launch a website in a weekend. Turning that website into a business? That takes clarity, planning, and a few smart decisions upfront.
This guide walks you through the full journey: from idea to launch to your first sale (and beyond). You’ll learn how to build a Shopify store that’s not only functional, but profitable from defining your niche and brand to setting up your store, driving traffic, and using tools like Deadline Funnel to convert browsers into buyers.
If you’re just getting started or want to relaunch with more intention, you’ve come to the right place.
Key takeaways
- Strategy comes first. Don’t jump into Shopify without defining your niche, ideal customer, and brand identity. These decisions shape everything from your design to your marketing.
- Your store is your foundation. Spend time on the build-out: use high-quality visuals, clear product descriptions, and well-structured pages to build trust from the start.
- Marketing starts early. You don’t need a huge budget, just a focused plan. Pick one or two traffic channels and show up consistently.
- Urgency drives action. Most carts are abandoned because there’s no reason to buy now. Tools like Deadline Funnel help turn interest into action by adding real, personalized deadlines to your offers.
- Growth is a loop, not a ladder. Use your data. Analyze what’s working, test improvements, and keep refining your store as you grow.
Before you pick a theme or upload your first product, you need a solid foundation.
Phase 1: The blueprint – strategy before you build
Shopify makes it easy to set up a store. But what you’re building isn’t just a website, it’s a business. And successful businesses don’t start with design or themes. They start with strategy. This is where most beginners get it wrong.
Before you even create your Shopify account, you need to get crystal clear on your niche, your customer, and your brand. Everything else depends on this foundation.
Here’s how to validate an idea without overthinking it:
- Solve a specific pain point. What frustrates people in a particular group? Look for inefficiencies, outdated tools, or common complaints in forums, reviews, or Reddit threads.
- Tap into passion communities. Hobbies like baking, fitness, gaming, and pet care all have strong followings. Products that enhance or support these passions are easier to market.
- Look for rising trends. Use Google Trends or Exploding Topics to see if interest in your product idea is growing or fading.
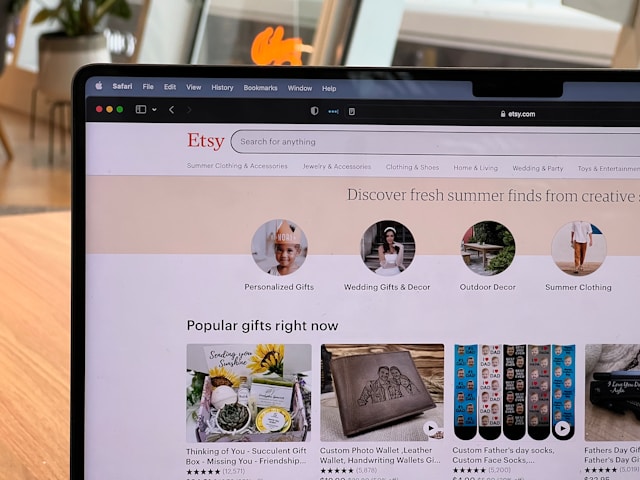
- Check existing demand. Browse Amazon, Etsy, or TikTok to see what people are already buying and how you could offer something better, faster, or more personal.
- Define your niche. For example, don’t just sell candles. Sell aromatherapy candles for new moms or camping candles that repel insects. The more specific your niche, the easier it is to build traction.
If you can’t describe your ideal buyer and what makes your product uniquely useful to them, you’re not ready to build a store yet.
Defining your ideal customer
Once you know what you’re selling, the next step is knowing who you’re selling it to. Your ideal customer profile should be simple but specific enough to shape your decisions.
Ask yourself:
- Who needs or wants this product?
- What do they value? Price, quality, uniqueness, sustainability, or something else?
- Where do they spend time online? Instagram, Pinterest, Reddit, email?
- What other brands do they already buy from?
Even one clear customer avatar can dramatically improve your marketing, product pages, and ad copy. You’re not trying to guess, you’re trying to build with a real person in mind.
Picture this: If you’re selling stylish pet gear for city dogs, your customer might be a millennial apartment dweller who treats their dog like a child and shops on Instagram. That’s a very different customer than someone who owns farm dogs and shops at hardware stores, and they’ll need to be spoken to differently.
Crafting your brand identity
Your brand is more than a logo or color palette. It’s how people feel about your store, and it starts with intentional choices.
Here’s what to focus on:
- Brand name. Keep it short, easy to spell, and relevant. Use a tool like Namechk to see if the domain and social handles are available. Don’t overthink it, but do make sure it’s searchable and memorable.
- Visual identity. Choose 1-2 fonts and 2-3 colors that match the feeling you want your store to evoke. Use Canva or Looka to test ideas if you’re not hiring a designer.
- Brand voice. How do you talk to your customers? Friendly? Expert? Playful? Your tone should match your audience and stay consistent across product pages, emails, and social media.
Don’t aim for perfection here. Aim for clarity. A clear, focused brand builds trust. It makes your store feel real and intentional, not like a half-finished side project.
Phase 2: The build-out – your step-by-step Shopify setup
Once your product strategy and brand foundations are in place, it’s time to build your Shopify store. This phase is where planning meets execution.
You’ll configure your store settings, add products, connect payment and shipping, and set up the pages your customers will see.

You’re not just trying to “get online”, you’re building a store that loads quickly, looks great, and actually gets people to buy.
Here’s how to do it, step by step.
Make a Shopify account
Start by creating your Shopify account. The process is simple: head to shopify.com and start a free trial. You’ll be guided through naming your store and choosing your industry.
When it comes to plans, Shopify offers three main options:
- Basic: Great for solo founders or new stores. Includes essential features and low transaction fees.
- Shopify: Ideal for growing businesses that need detailed reporting and more staff accounts.
- Advanced: Built for scaling stores with custom reporting, international pricing, and lower credit card rates.
You can always start on Basic and upgrade later as your needs grow.
Set up your basic store settings
Start by configuring the core settings that power your store behind the scenes. This includes your store name, contact information, and default currency. A new account will guide you through several basic questions, and allow you to fill in your store name (if you have one! If not, you can pick later.)
Key steps (for existing accounts):
- From your Shopify admin, go to Settings > General to enter your store name, legal business name, and address.
- Set your default currency under Settings > Store details/Default store settings. Choose the currency your customers expect to see.
- Under Settings > Taxes and duties, decide if you’ll include taxes in your prices or add them at checkout. Shopify can auto-calculate tax rates based on location.
Pro tip: If you’re selling physical products, enable shipping zones early. Go to Settings > Shipping and delivery and define where you’ll ship, how much it costs, and which carriers you’ll use. Don’t leave this until launch day! Customers won’t convert if shipping is vague or expensive.
Add your products and organize them
Your product catalog is the heart of your store. Each product listing should do three things: grab attention, build trust, and make the next step obvious.
Steps to follow:
- Go to Products > Add product. Include a clear title, detailed description, and at least 2-3 high-quality images per product.
- Use consistent naming conventions. For example, if you sell apparel, format titles like “Men’s Crewneck T-Shirt – Navy” instead of “Navy Tee.”
- Set up collections to group products logically. For example:
- “New Arrivals”
- “Under $50”
- “Best Sellers”
- Use tags to help with filtering and search. Tags like “cotton,” “gift idea,” or “eco-friendly” can improve navigation.
Don’t forget to:
- Clearly list pricing and include all product variants (size, color, quantity options).
- Use high-quality, well-lit photos from multiple angles. Add a close-up if texture matters.
- If possible, show the product in context on a person, in a room, or in use.
These small details build trust and make it easier for customers to hit “Buy.”

Customize your theme and key pages
Shopify themes control how your store looks and feels. Start with a free theme, then customize it to match your brand.
Steps to take:
- Go to Online Store > Themes, then click Customize on your active theme.
- Add your logo, set your brand colors, and choose fonts that match your tone.
- Customize your homepage to highlight your top products or collections. Use a hero image, featured products, and a clear call to action like “Shop Now.”
- Create essential pages:
- About page: Tell your story in 2-3 short paragraphs. Focus on what makes your brand different.
- Contact page: Include a form and your email address. Add a phone number if you offer support.
- FAQ page: Answer common questions about shipping, returns, and sizing.
Quick tip: Preview your store on mobile as you go. Over half of Shopify traffic comes from mobile devices, so check that buttons are easy to tap and text is readable.
Configure payments & shipping
Now set up how you’ll get paid and how your products will get to customers.
To enable payments:
- Go to Settings > Payments.
- Use Shopify Payments for a fast, integrated option that supports major credit cards and digital wallets.
- You can also add PayPal, manual payment options (like bank transfer), or alternative gateways if needed.
To configure shipping:
- Head to Settings > Shipping and delivery.
- Define your shipping zones (where you ship to) and set clear pricing – flat rate, free shipping, or carrier-calculated rates.
- Be upfront: unclear or expensive shipping is one of the top reasons for cart abandonment.
Quick win: Add estimated delivery times on your product pages or cart. It helps set expectations and can boost conversion rates.
Now, you’re ready to open up shop and start welcoming sales.
Phase 3: The launch engine – how to get your first sales
Your store’s live. Now what? It’s time to shift focus from building to selling.
Getting your first few sales is a huge milestone, and it doesn’t require a massive budget or complicated strategy.
What you need is a simple funnel: bring in visitors, convert them into customers, and give them a reason to come back.
Driving your first visitors (top of the sales funnel)
A beautiful store with no traffic won’t go anywhere. Start small, stay focused, and test what works.
Pick one social platform and post consistently
If your customers hang out on Instagram, post Reels and product shots. If they’re on TikTok, show behind-the-scenes content or demos. Don’t try to be everywhere, just be visible where it counts.
Start creating helpful content
Write blog posts that solve problems or answer questions in your niche. Or launch a simple YouTube channel to show your products in action. Great content builds trust and drives organic traffic.
Leverage your personal network
Friends, family, coworkers, old classmates – ask them to check out your store! Offer a launch discount and encourage honest feedback. Your first 10-20 customers will likely come from people you already know.
Converting visitors into customers (bottom of the sales funnel)
Once people land on your store, don’t waste the opportunity. Guide them clearly toward buying.
Use social proof everywhere
Add customer reviews under each product. Highlight testimonials on your homepage. Even a handful of real reviews can build trust fast.
Make your CTAs obvious and strong
Avoid vague links like “Learn More.” Use buttons like “Add to Cart” or “Shop the Collection” that tell people exactly what to do.
Capture emails from day one
Add a simple popup offering 10% off or a free shipping code in exchange for an email. It builds your list and gives you a way to bring people back with future promos.
Supercharging your sales: Using urgency with DeadlineFunnel
Cart abandonment is brutal. Over 70% of shoppers leave without buying, often with every intention of “coming back later.” But later rarely comes unless you give them a reason to act now.
DeadlineFunnel lets you add real deadlines to your store, so when you say “limited-time offer,” you actually mean it.
Here’s how to use it effectively.
- Turn abandoned carts into conversions
Add a DeadlineFunnel-powered deadline to your abandoned cart emails. For example: “Complete your purchase in the next 24 hours and get 10% off.” The timer is real. When it runs out, the offer’s gone. - Run smarter sales and promos
Instead of blasting a generic site-wide discount, use personalized countdowns for your flash sales, evergreen offers, or launch campaigns. Each customer sees a deadline based on when they engage so the pressure feels genuine, not artificial. - Build trust with consistent follow-through
Nothing kills urgency faster than fake timers. DeadlineFunnel keeps things honest by syncing your emails, landing pages, and redirects. When the clock hits zero, the offer ends, every time.
Want to turn more browsers into buyers? See how DeadlineFunnel adds authentic urgency to your Shopify store with our Shopify integration.

Phase 4: The growth loop – using data to scale
Once your store is live and making sales, the real work begins. Growth doesn’t come from guesswork. It comes from testing, improving, and doubling down on what works.
This phase is all about turning your Shopify store into a learning machine.
Understand Shopify Analytics
Start with what’s already built into your dashboard. Shopify’s built-in analytics give you the pulse of your store at a glance.
Key reports to watch:
- Total Sales: See how much revenue you’re bringing in over time.
- Online Store Conversion Rate: Breakdown includes sessions to cart, sessions to checkout, and completed purchases.
- Average Order Value (AOV): Helps you gauge the impact of upsells, bundles, or free shipping thresholds.
Click into Analytics > Reports to explore deeper views, like sales by traffic source or product performance. Use filters to compare time periods and spot trends.
Tip: Keep a weekly log of your core KPIs so you can track improvements (or dips) after specific changes.
Here’s a small sample of the kinds of reports you can see:

Add Google Analytics for deeper insight
Shopify’s reports are great, but if you want to understand behavior, like how long people stay on your site or where they drop off, Google Analytics (GA4) is the next step.
With GA4, you can analyze things like:
- Bounce rates and time on site
- Top-performing traffic sources
- Device and location data
This lets you optimize for real behavior, not assumptions.
Follow the optimization loop
Think of growth as a cycle:
- Analyze: Look at your data – what’s working, what’s underperforming?
- Hypothesize: Make a theory. Maybe your product page needs a stronger CTA. Or maybe mobile users are bouncing because of slow load times.
- Test: Change one variable, like your headline, price, or layout, and measure the impact.
- Measure: Did the change improve conversion rate, time on page, or AOV?
Then repeat.
Over time, this loop turns your store into a smarter, leaner version of itself.
Conclusion
Building a Shopify store is only half the game. The rest is about staying consistent – refining your offer, testing what works, and using the right tools to move the needle.
If you’re ready to turn more visitors into buyers, Deadline Funnel is a powerful way to add urgency without the gimmicks. Whether you’re running a flash sale, launching a new product, or following up on abandoned carts, Deadline Funnel helps you create real, behavior-based deadlines that drive action.
Ready to see it in action? Explore how Deadline Funnel integrates with Shopify and start building smarter funnels with built-in urgency.
FAQ
How much does it cost to start selling on Shopify?
At minimum, you’ll need to pay for:
- A Shopify plan: Starts at $39/month (Basic), with higher tiers for more features
- A custom domain name: Around $10–$20/year (optional but recommended)
- A theme: Shopify offers many free themes, but premium themes can cost $180+ one-time
- Apps or integrations: Many are free, but some add monthly costs depending on functionality
So realistically, expect to spend $50–$100 to get started, depending on the tools you use.
Do I need a business license to sell on Shopify?
It depends on where you live and what you’re selling. Shopify doesn’t require a business license to open a store, but your local or national laws might.
- If you’re in the US, many states require a sales tax permit or business registration.
- In the EU or UK, you may need to register as a sole trader or business entity, especially if you exceed certain income thresholds.
Check your local regulations or speak with a small business advisor before launching.
Can I do dropshipping on Shopify?
Yes. Shopify is one of the most popular platforms for dropshipping.
Dropshipping means you sell products without holding inventory—your supplier ships items directly to the customer when an order comes in.
Shopify integrates with popular dropshipping apps like:
- DSers (for AliExpress sourcing)
- Spocket
- Printful / Printify (for print-on-demand)
It’s a low-risk way to start selling, though profit margins are often lower and competition can be high.
How do I handle taxes and shipping rates?
Shopify can calculate sales tax automatically based on your store’s location and where you ship. But you’re still responsible for registering and filing taxes in the states or countries where you have nexus (physical presence, employees, or significant sales).
For shipping, you can set flat rates, offer free shipping, or use real-time carrier rates (available on the Advanced plan or with Shopify Shipping). If you’re shipping internationally, make sure to configure customs forms and duties using an app like Zonos or Easyship.
Best practice: Start with flat rates or free shipping on domestic orders, then layer in real-time rates as your business grows.
Example: A Canadian merchant selling to the U.S. might offer free shipping on orders over $50 domestically, but use calculated USPS rates for U.S. orders to avoid eating the cost.